Updated: November 9, 2025 — Practical Renko trend trading rules with clean entries, consistent trailing, and scaling tactics.
Renko charts filter small price noise by printing fixed-size “bricks” only when price moves enough to form a new block. This clarifies trend direction and makes entries more objective. Below are five proven tips to ride trends longer and manage risk consistently.
Before trading trends, tune your brick size with the ATR Renko brick size guide and lock your trigger rules with the Renko buy & sell signal checklist.
🎥 Prefer to watch? See the video walkthrough of these 5 Renko trend-trading tips here.
Don’t have time? Try the Quick Read below:
- Bias: Set direction from a higher timeframe + Renko swing structure; ensure brick size is tuned first.
- Trigger: Break of last swing + first confirm brick; optional MACD/Supertrend or W/M confirm.
- Trail: Choose one method—1–2 brick trail or swing-based—and apply it consistently.
- Scale: Add on clean pullbacks; take partials into prior swing zones; cap total risk per idea.
- Avoid Chop: Trade only range breaks + a confirm brick; use session/news filters.
Table of Contents
Tip 1 — Establish Trend Bias (HTF + Structure)
- Higher timeframe (HTF): use a higher timeframe for direction (e.g., Daily for swing, 4H for tactical).
- Structure: rising swing highs/lows → long bias; falling swings → short bias.
- Brick sizing first: tune size so swings read cleanly (ATR 14 × ~2.0 is a solid start).
Tip 2 — Entry Triggers (Break + Confirm Brick)
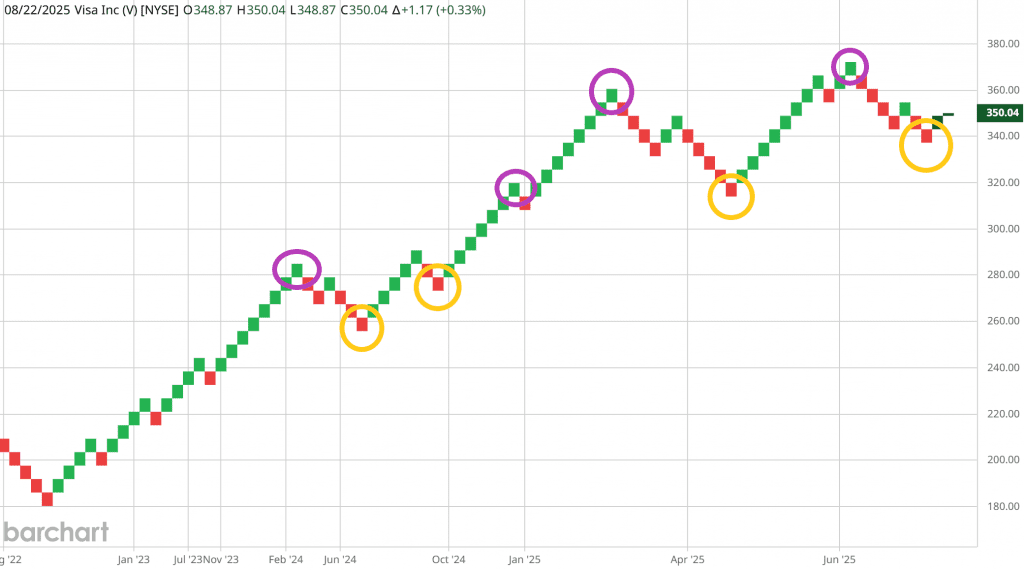
- Wait for a break of the last swing level in the bias direction.
- Enter on the first confirm brick that closes beyond that level.
- Stop: 1–2 bricks beyond invalidation (or an ATR distance).
- Optional confirm: W/M pattern or indicator (MACD up/down, Supertrend flip) aligned with the move.
Example: After a higher-timeframe uptrend and rising Renko swings, price breaks the last swing high and prints a bullish confirm brick. Enter; stop 1–2 bricks below invalidation; trail as new swings form.
Tip 3 — Trail Smartly (1–2 Bricks or Swing Trail)
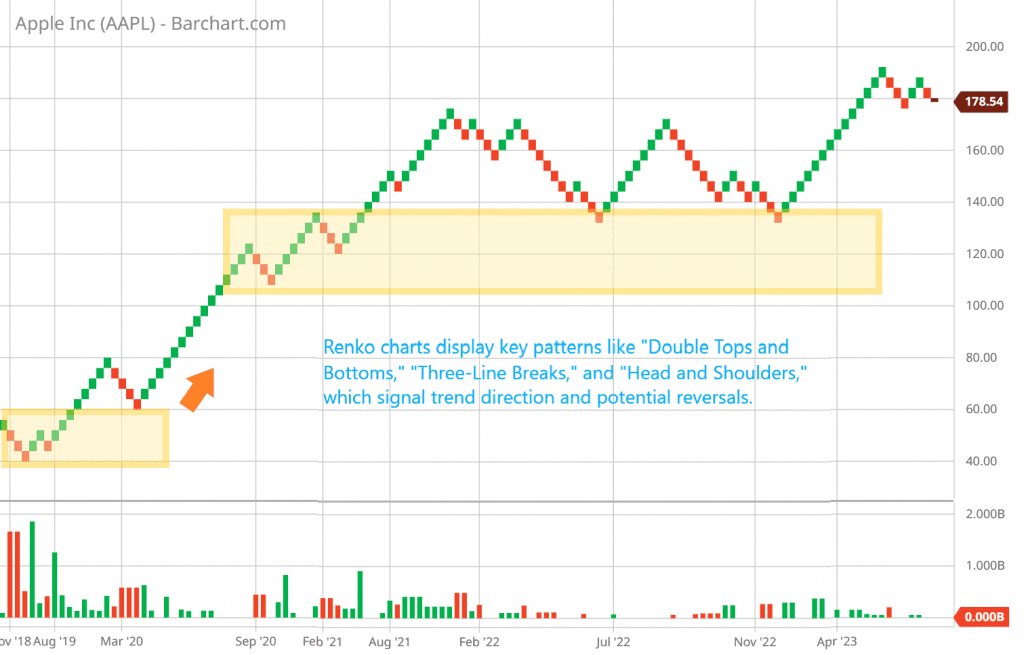
- Brick trail: trail 1–2 bricks behind price; simple and objective.
- Swing trail: move stop below/above the most recent swing once it forms.
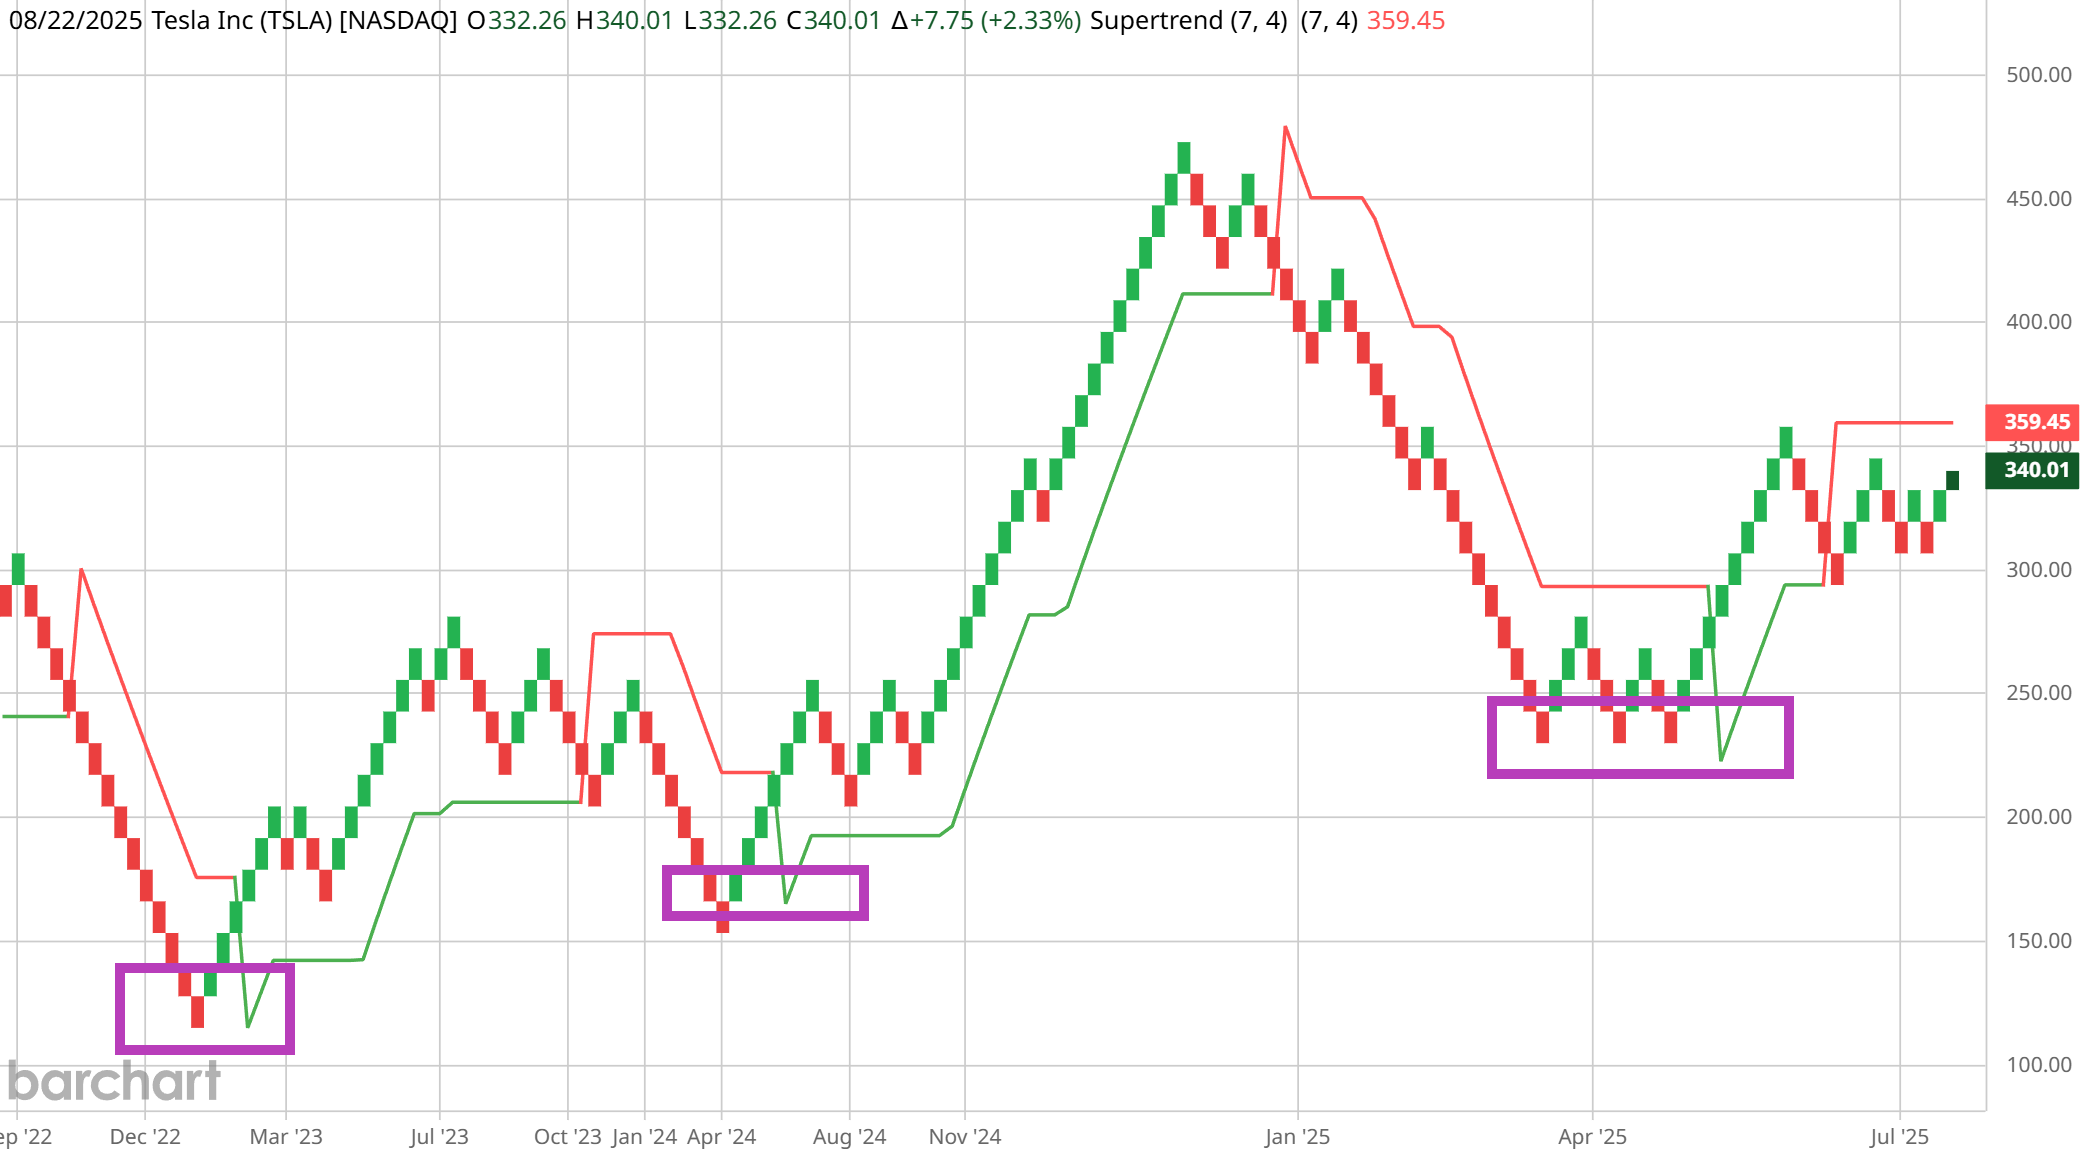
- Indicator trail (optional): Supertrend as a dynamic guide.
- Be consistent: pick one trailing style per strategy and stick with it.
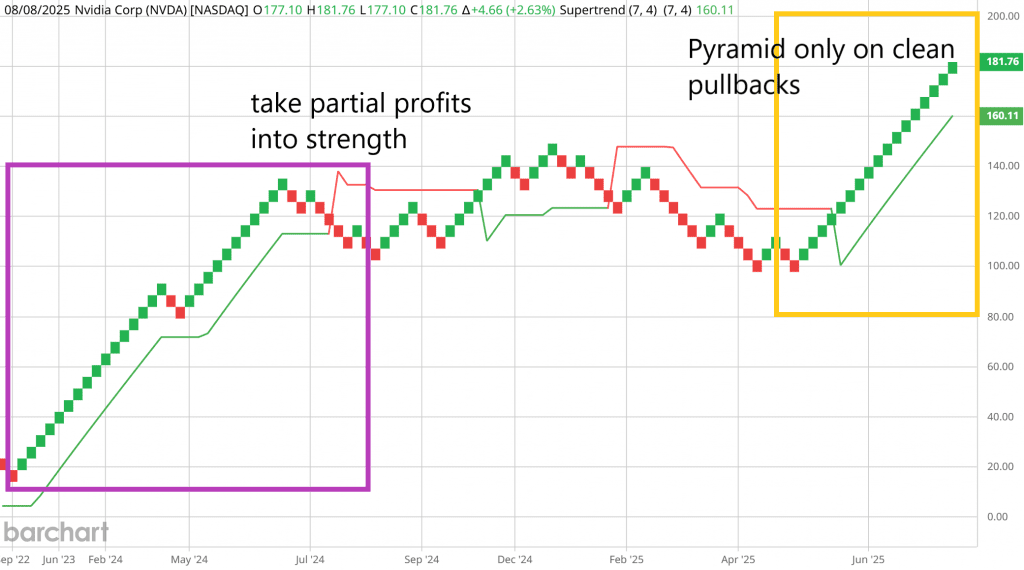
Tip 4 — Scale In & Out (Pyramids & Partials)
- Scale in: add on clean pullbacks that print a confirm brick with trend.
- Partials: take partial profits into strength at prior swing zones.
- Risk cap: keep total risk per idea bounded (e.g., 1–2R initial; adds funded by unrealized gains).
Tip 5 — Avoid Chop (Range & Session Filters)
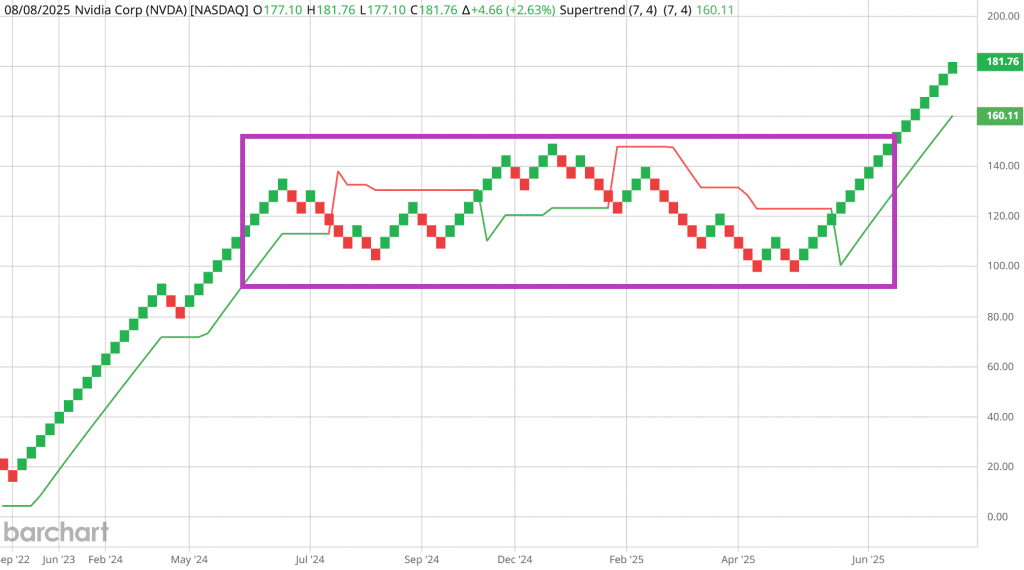
- Range filter: mark range bounds; only trade a break + confirm brick beyond it.
- Session filter (intraday): focus on most liquid sessions; skip illiquid hours.
- News filter: avoid entries right before high-impact events.
FAQs
Do I need indicators for trend trading with Renko?
How do I choose the right brick size?
What’s the best timeframe?
Where should I place the stop?
Further Reading
- ATR Renko Brick Size: Step-by-Step
- Renko Buy & Sell Signals: Patterns & Examples
- Best Renko Indicators: Full List & Examples
- Renko Patterns: 5 Powerful Setups
Let’s Connect
- Subscribe to the Renko Trading Channel for weekly updates.
