Table of Contents
Welcome to “Trading Plan Mastery: 5 Steps to Your Profitable Renko Strategy.” In this comprehensive guide, we will embark on a journey to demystify the art of trading and provide you with a clear roadmap to develop a profitable Renko trading strategy. Whether you are a novice trader or an experienced investor looking to enhance your skills, this guide will equip you with the knowledge and tools to navigate the financial markets with confidence.
Introduction
The Importance of a Trading Plan
Imagine setting out on a cross-country road trip without a map or a GPS. It’s an adventure, but it’s also a risky venture. Similarly, entering the world of trading without a well-structured plan can lead to unpredictable and often unfavorable outcomes. A trading plan serves as your roadmap in the financial markets, guiding your decisions and actions, and ultimately, leading you towards your financial goals.
Pros:
- Provides a structured approach to trading.
- Helps maintain discipline and emotional control.
- Enhances consistency and reduces impulsive decisions.
Cons:
- Requires time and effort to create and maintain.
- Doesn’t guarantee success; losses are still possible.
- May need adjustments as market conditions change.
The Power of Renko Charts
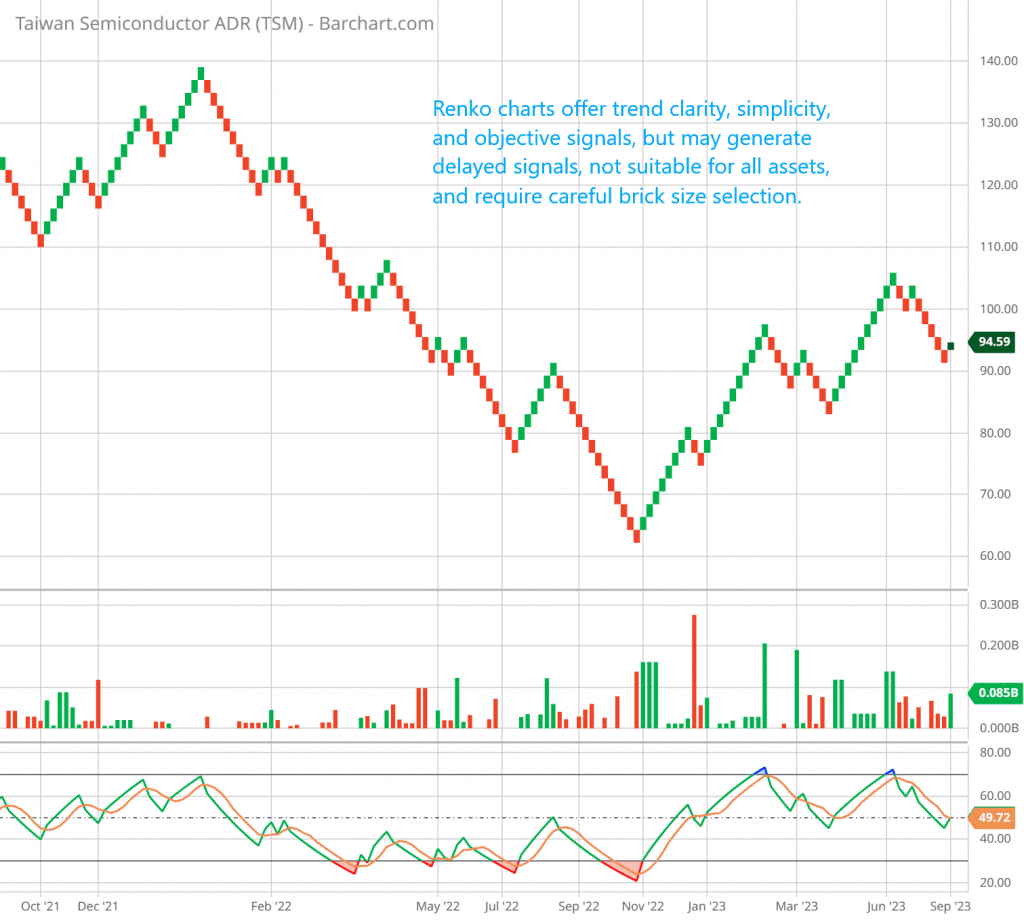
Before delving into our five-step strategy, let’s shed some light on Renko charts, a unique and powerful tool in the world of technical analysis. Renko charts differ from traditional candlestick or bar charts, as they focus solely on price movements, ignoring time and volume. Instead of fixed time intervals, Renko charts use “bricks” to represent price changes.
Pros:
- Filter out market noise, making it easier to identify trends.
- Provide clear entry and exit signals based on price action.
- Offer a more objective perspective on price movements.
Cons:
- May not be suitable for all trading styles or assets.
- Can sometimes produce delayed signals in volatile markets.
- Requires traders to adapt to a different way of analyzing price data.
Understanding Renko Charts
Renko Basics
Imagine you’re constructing a brick wall. Each brick has a fixed size, and you only add a new brick when the price moves a certain amount. Renko charts operate in a similar way. These “bricks” are created when the price moves beyond a predefined value, either up or down. When the price reverses direction by a specified amount (the brick size), a new brick is formed.
Example:
Suppose you’re trading a stock with a Renko brick size of $2. If the stock is trading at $50 and then moves to $52, a new brick is formed. If the price subsequently drops to $48, another brick is formed, reversing the trend.
Pros:
- Focuses on significant price movements.
- Eliminates minor fluctuations, reducing noise.
- Provides a clear visual representation of trends.
Cons:
- May miss some intraday price details.
- Requires careful selection of brick size for different assets.
- Not ideal for very short-term scalping strategies.
Advantages and Limitations
Like any trading tool, Renko charts have their strengths and weaknesses. Understanding these can help you decide when and how to use them effectively in your trading strategy.
Advantages:
- Trend Clarity: Renko charts excel at highlighting trends, making it easier to identify entry and exit points.
- Simplicity: They offer a simplified view of price action, which can reduce analysis paralysis.
- Objective Signals: Since Renko charts rely solely on price movements, they provide objective signals, reducing subjectivity.
Limitations:
- Delayed Signals: In fast-moving markets, Renko charts may generate delayed signals.
- Not Suitable for All Assets: They may not be the best choice for assets with low liquidity or irregular price movements.
- Brick Size Selection: Choosing the right brick size can be challenging and may require adjustment.

The 5 Steps to a Profitable Renko Strategy
Overview of the Five Steps
Developing a profitable Renko trading strategy requires a systematic approach. These five steps will be your guiding light in this journey:
- Setting Clear Trading Goals: Before you start trading, you must define your objectives. What do you aim to achieve? Are you looking for short-term gains or long-term wealth accumulation? Your goals will shape your strategy.
- Selecting Suitable Renko Parameters: Renko charts offer flexibility in terms of brick size and time frame. You’ll learn how to choose the right settings to match your trading goals and market conditions.
- Developing Entry and Exit Rules: This step is all about crafting your strategy. What indicators will you use for entries and exits? How will you define trends and reversals? We’ll help you create a rule-based system.
- Risk Management Strategies: Trading always involves risks. Here, you’ll discover how to protect your capital. From position sizing to setting stop-loss orders, you’ll learn risk management techniques that every trader should know.
- Building a Trading Plan: A solid trading plan is your compass in the turbulent seas of the financial markets. We’ll guide you in crafting a comprehensive plan that encompasses your goals, strategy, and risk management rules.
Step 1 – Setting Clear Trading Goals
The Significance of Trading Goals
In the trading world, having a destination in mind is just as important as knowing your starting point. Your trading goals act as your North Star, providing direction and purpose to your trading journey. Without clear goals, you’re more likely to get lost in the market’s ever-changing landscape.
Example: Let’s say your goal is to generate a consistent monthly income from trading. With this clear objective, you can focus on strategies and asset classes that align with this goal, such as options trading or dividend stocks.
Pros:
- Focus and Direction: Trading goals give you a clear purpose, helping you stay on track.
- Motivation: Achieving your goals can be a powerful motivator to continue refining your trading skills.
- Measurement: You can track your progress and assess the effectiveness of your strategy against your goals.
Cons:
- Risk of Over-ambition: Setting unrealistic goals can lead to disappointment and poor decision-making.
- Inflexibility: Goals should be adaptable as market conditions change, and overcommitting to a fixed goal can be counterproductive.
- Psychological Pressure: Striving to meet ambitious goals may increase stress and emotional trading.
Defining Your Trading Goals
Setting trading goals isn’t a one-size-fits-all endeavor. Your goals should align with your financial situation, risk tolerance, and time commitment. Here are some common trading goals:
- Income Generation: Earning a regular income from trading to supplement your primary income.
- Wealth Accumulation: Building long-term wealth through capital appreciation.
- Risk Management: Preserving and protecting your capital to minimize losses.
- Skill Development: Improving your trading skills and knowledge for personal growth.
- Retirement Planning: Using trading to fund your retirement or achieve financial independence.
When defining your goals, make them SMART (Specific, Measurable, Achievable, Relevant, and Time-bound). For example, “I aim to generate a 10% annual return through swing trading technology stocks over the next three years.”
Step 2 – Selecting Suitable Renko Parameters
Understanding Renko Parameters
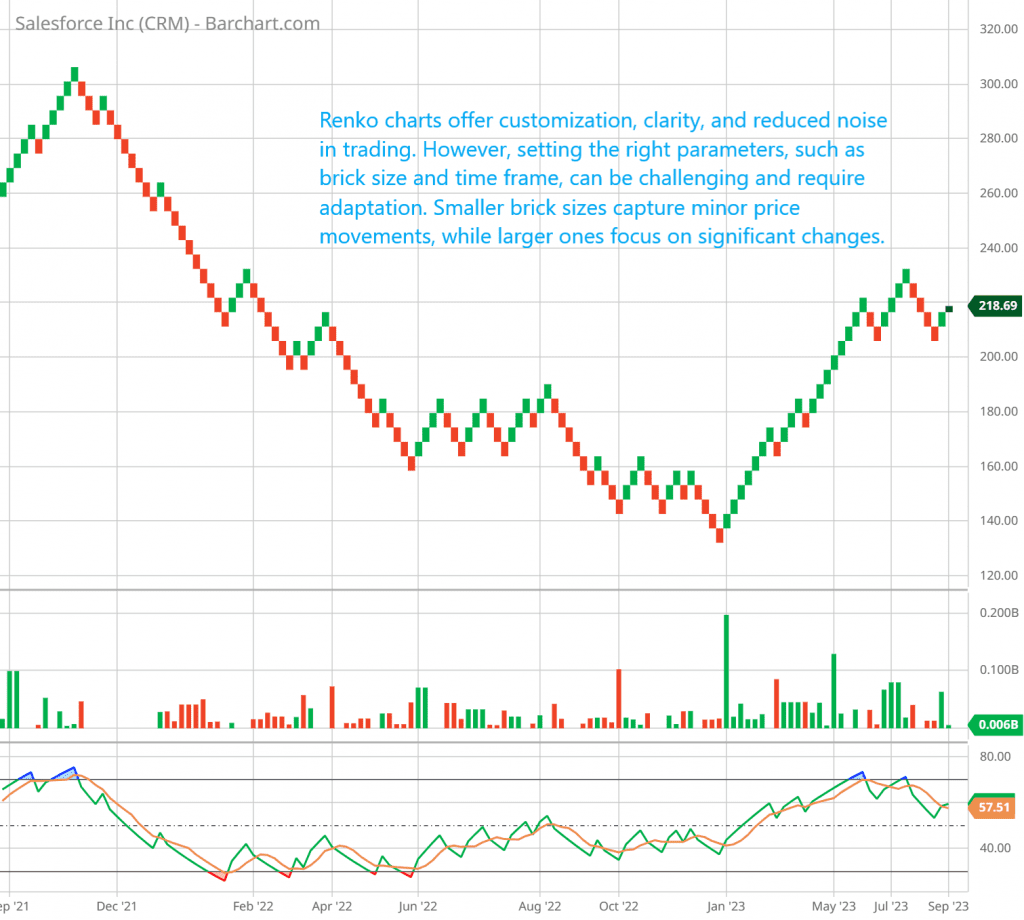
Renko charts are a powerful tool in trading, but to harness their potential, you need to choose the right parameters. Key parameters include the brick size and the time frame you wish to analyze. These choices will significantly impact your trading strategy’s effectiveness.
Example: Imagine you’re trading the Forex market, and you’ve decided to use Renko charts. If you set the brick size too small, you may encounter excessive noise and frequent reversals. Conversely, if the brick size is too large, you might miss important price movements.
Pros:
- Customization: Renko charts allow you to tailor your analysis to suit different assets and trading styles.
- Clarity: Properly chosen parameters can provide clear and actionable signals.
- Reduced Noise: Well-adjusted parameters filter out market noise, making it easier to identify trends.
Cons:
- Parameter Selection Challenge: Determining the optimal brick size and time frame can be tricky, requiring experimentation.
- Adaptation Required: Parameters may need adjustment as market conditions change or if you switch to different assets.
Choosing the Right Brick Size
The brick size is the most crucial Renko parameter. It determines the price increment required for a new brick to form. Smaller brick sizes capture minor price movements, while larger brick sizes focus on significant price changes.
Example: Suppose you’re trading a volatile cryptocurrency like Bitcoin. A brick size of $100 might be appropriate, as it captures meaningful price shifts while ignoring minor fluctuations. However, for a stable blue-chip stock, a smaller brick size, such as $1, might be more suitable.

ATR-Based Renko Chart Brick Size Calculation: Proven Tips and Tricks
Selecting the Time Frame
While Renko charts are primarily based on price movements, you can choose the time frame for your analysis. This time frame specifies the period over which each brick forms, regardless of price changes.
Example: If you’re a day trader, you might opt for a 5-minute time frame to capture intraday price movements. On the other hand, a swing trader may prefer a daily time frame to identify longer-term trends.
Step 3 – Developing Entry and Exit Rules
The Essence of Entry and Exit Rules
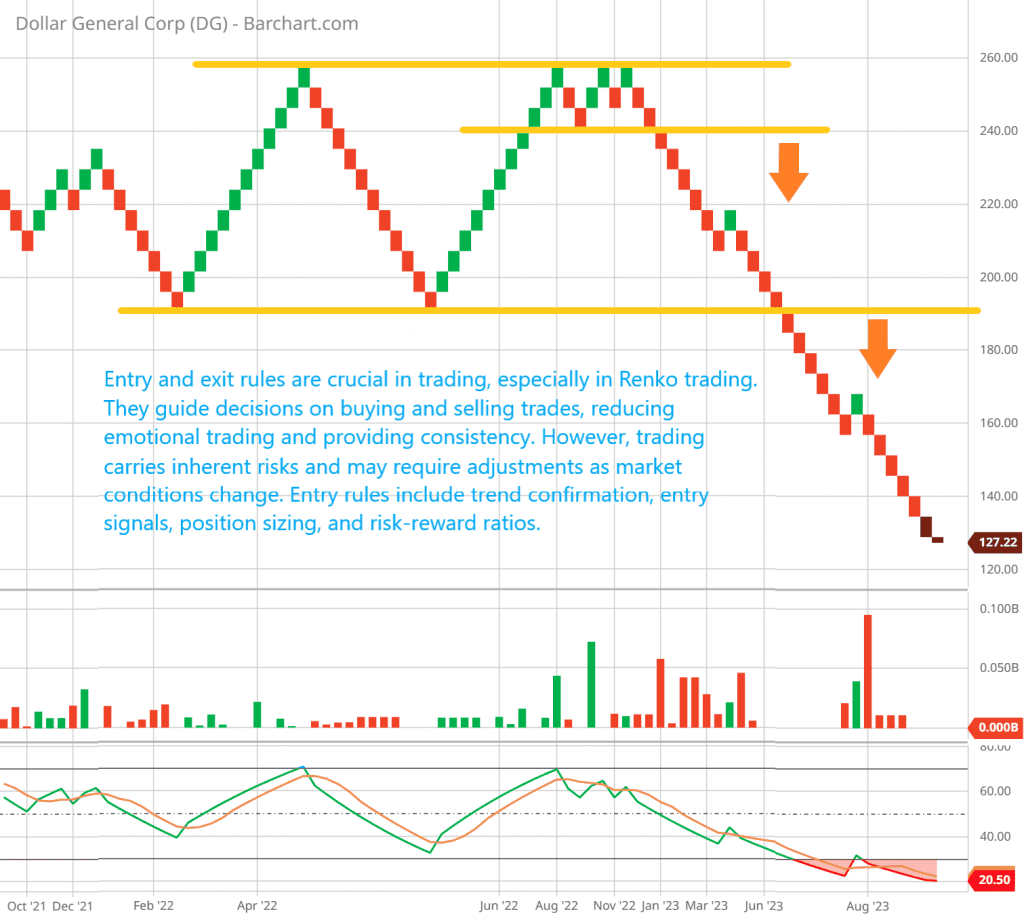
Entry and exit rules form the heart of any trading strategy, and in Renko trading, they are no less crucial. These rules guide your decisions on when to enter a trade (buy) and when to exit a trade (sell or take profit). Developing clear and systematic rules is essential for consistency and success in trading.
Example: Imagine you’re trading Apple Inc. (AAPL) using Renko charts. Your entry rule might be based on a breakout from a consolidation pattern, while your exit rule could involve setting a trailing stop-loss order to protect profits as the price continues to rise.
Pros:
- Objective Decision-Making: Rules reduce emotional trading and provide a clear framework for action.
- Consistency: With well-defined rules, you can maintain a consistent approach across multiple trades.
- Backtesting and Optimization: You can easily backtest and refine your strategy based on historical data.
Cons:
- No Guarantees: Even with rules, trading carries inherent risks, and losses are possible.
- Adaptation Needed: Rules may require adjustments as market conditions change.
Crafting Entry Rules
- Identify Trend Confirmation: Determine how you’ll confirm the trend using Renko charts. This can involve using indicators like Moving Averages, Relative Strength Index (RSI), or specific price patterns.
- Define Entry Signals: Specify the conditions that must be met before you enter a trade. For example, you might require a certain number of consecutive bricks in the direction of the trend as confirmation.
- Position Sizing: Decide how much capital you’ll allocate to each trade and how many contracts, shares, or units you’ll trade. This is crucial for risk management.
- Risk-Reward Ratio: Establish your desired risk-reward ratio for each trade. This ratio should align with your overall risk management strategy.
Example: Let’s say you’re trading EUR/USD with Renko charts. Your entry rule might be: “Buy when there are three consecutive bullish bricks after a bullish trend confirmation, with a risk-reward ratio of 1:2.”
Developing Exit Rules
- Set Stop-Loss Orders: Determine where you’ll place your stop-loss orders to limit potential losses. This should be based on the volatility of the asset and your risk tolerance.
- Take Profit Levels: Specify the price levels at which you’ll take profits. This can be based on technical analysis, such as support and resistance levels.
- Trailing Stops: Consider using trailing stop orders that automatically adjust as the price moves in your favor, locking in profits while allowing room for potential gains.
- Exit Conditions: Define conditions for exiting a trade if your initial criteria are no longer met. This could include a change in trend direction or a specific time-based exit.
Example: For your EUR/USD trade, your exit rule might be: “Place a stop-loss order 10 pips below the entry price and set a take profit order at a level 20 pips above the entry price. Use a trailing stop of 10 pips to protect profits.”

Step 4 – Risk Management Strategies
The Importance of Risk Management
In trading, risk is inevitable. However, how you manage and mitigate that risk can significantly impact your overall success. Risk management is the safeguard that ensures a few losing trades don’t wipe out your trading capital.
Example: Imagine you’re a forex trader, and you’ve experienced a losing streak. Effective risk management ensures that you don’t risk more than a predetermined percentage of your capital on any single trade. This protects your account from significant drawdowns.
Pros:
- Capital Preservation: Risk management strategies aim to protect your trading capital from substantial losses.
- Emotion Control: Having predefined risk limits reduces emotional decision-making during adverse market conditions.
- Sustainability: Proper risk management enables you to continue trading over the long term, even after losses.
Cons:
- Reduced Profit Potential: Conservative risk management may limit profit potential, but it also minimizes potential losses.
- Complexity: Implementing risk management strategies can be challenging for novice traders.
Key Risk Management Techniques
- Position Sizing: Determine the size of your position based on the risk you’re willing to take. Common methods include fixed fractional sizing (risking a fixed percentage of your capital per trade) or fixed dollar sizing (risking a specific dollar amount per trade).
- Setting Stop-Loss Orders: Always use stop-loss orders to limit potential losses on every trade. The placement of your stop-loss should consider the asset’s volatility and your risk tolerance.
Example: Suppose you have a trading account with $10,000, and you’re willing to risk 2% of your capital on each trade. If you’re trading a volatile cryptocurrency, you might set a stop-loss order at 5% below your entry price.
- Diversification: Avoid putting all your capital into a single asset or trade. Diversification spreads risk across different assets or trades, reducing the impact of a single loss.
- Risk-Reward Ratio: Determine the risk-reward ratio for each trade. This helps ensure that your potential reward justifies the risk you’re taking. Common ratios include 1:1, 1:2, or 1:3.
What Is Diversification? Definition as Investing Strategy
Example: If your trade has a stop-loss of $100 and a take profit of $200, you have a risk-reward ratio of 1:2. This means for every dollar you risk, you aim to make $2.
- Use of Trailing Stops: Consider using trailing stop orders that automatically adjust as the trade moves in your favor. This locks in profits while allowing for potential additional gains.
Example: If the price of a stock increases by $2 after you enter a trade, a trailing stop of $1 would automatically adjust to $1 below the current market price, protecting a portion of your gains.
By implementing these risk management strategies, you can safeguard your trading capital and minimize the impact of losses, ensuring you can continue trading and refining your Renko strategy over the long term.

Step 5 – Building a Trading Plan
The Blueprint of Success
A trading plan serves as the blueprint for your entire trading journey. It’s your roadmap, your rulebook, and your anchor in the turbulent waters of the financial markets. Without a well-structured trading plan, even the most talented traders can find themselves adrift and uncertain.
Example: Imagine you’re a pilot about to embark on a long-distance flight. Before takeoff, you wouldn’t just wing it—you’d follow a meticulously planned flight path, taking into account weather conditions, fuel requirements, and emergency procedures. Similarly, a trading plan provides guidance, structure, and safeguards for your trading journey.
Pros:
- Discipline: A trading plan enforces discipline by setting clear rules and guidelines.
- Consistency: It ensures that you follow a consistent approach in all your trades.
- Objective Decision-Making: A well-defined plan reduces emotional trading.
Cons:
- Initial Effort: Creating a trading plan requires time and thought.
- Adaptation: Plans need to evolve to accommodate changes in market conditions or personal circumstances.
- No Guarantees: Even with a solid plan, trading involves risk, and losses can occur.
Components of a Trading Plan
- Trading Goals: Reiterate your trading goals. Are you aiming for income generation, wealth accumulation, or something else? Specify your short-term and long-term objectives.
- Renko Parameters: Document the specific Renko chart settings you’ll use, including the brick size and time frame, and the reasoning behind your choices.
- Entry and Exit Rules: Detail your entry and exit rules, outlining the conditions for entering trades, setting stop-loss orders, and taking profit.
- Risk Management: Reiterate your risk management strategies, including your position sizing method, stop-loss placement, diversification approach, and risk-reward ratios.
Example:
- “I will risk no more than 2% of my trading capital on each trade, using fixed fractional position sizing.”
- “I will use trailing stop orders to lock in profits once a trade is in profit by at least 1:1 risk-reward ratio.”
- Monitoring and Evaluation: Describe how you will monitor your trades and evaluate your strategy’s performance. Define criteria for assessing when to make adjustments or changes to your plan.
- Contingency Plans: Outline steps to take in case of unforeseen circumstances or market events. This can include what to do in case of a losing streak or market disruptions.
Example:
- “If I experience three consecutive losing trades, I will take a break from trading and review my strategy.”
- “In the event of a market-wide crash, I will exit all positions to protect my capital.”
- Emotional Control: Document your strategies for maintaining emotional discipline during trading. Include techniques for dealing with fear, greed, and other emotions that can affect your decision-making.
- Review and Revision: Establish a regular review schedule for your trading plan, indicating when and how you will make updates based on your evolving experience and market conditions.
By creating a comprehensive trading plan, you not only provide yourself with a structured framework for trading but also enhance your ability to adapt and thrive in the dynamic world of Renko chart trading. With your plan in place, you are well-equipped to embark on your journey toward profitable Renko trading.
Section 9: Implementing and Testing Your Renko Strategy
Transitioning to Live Trading
With your trading plan in hand, it’s time to put your Renko strategy into action. Transitioning from theoretical knowledge to live trading can be both exciting and challenging. Here are the steps to make this transition smoother:
Example:
Suppose your trading plan outlines a strategy for trading Renko charts on a specific currency pair, and you’ve completed thorough backtesting.
Pros:
- Practical Application: Live trading allows you to experience the market’s dynamics firsthand.
- Immediate Feedback: You can evaluate how well your strategy performs in real-time.
- Psychological Training: Live trading helps you develop emotional discipline.
Cons:
- Risk of Loss: Real money is on the line, which can lead to losses.
- Psychological Pressure: Emotional challenges may arise when trading real capital.
Continuous Monitoring and Adjustments
Trading is an ongoing process. To ensure the long-term success of your Renko strategy, you must continuously monitor its performance and make necessary adjustments. Markets evolve, and what works today may not work tomorrow.
Example:
Imagine your Renko strategy was performing well initially, but after a few months, it starts to underperform. In this scenario, you might need to revisit your entry and exit rules, or even consider a different asset class.
Pros:
- Adaptability: Regular monitoring allows you to adapt to changing market conditions.
- Improved Performance: Tweaking and optimizing your strategy can lead to improved results.
- Risk Mitigation: Identifying and addressing issues early can prevent significant losses.
Cons:
- Time and Effort: Monitoring and adjustment can be time-consuming.
- No Guarantees: Even with adjustments, trading carries inherent risks.
Section 10: Conclusion and Next Steps
Summary of Key Takeaways
In this guide, we’ve journeyed through the five essential steps to master your Renko trading strategy:
- Setting Clear Trading Goals: Define your trading objectives to give your strategy purpose and direction.
- Selecting Suitable Renko Parameters: Customize your Renko charts to match your goals and market conditions.
- Developing Entry and Exit Rules: Craft a rule-based system to guide your trading decisions.
- Risk Management Strategies: Protect your capital and minimize losses through effective risk management.
- Building a Trading Plan: Create a comprehensive plan that integrates all the components of your strategy.
Your Next Steps
As you embark on your journey to implement your Renko strategy, here are some key next steps to consider:
- Practice: Start with a demo account to practice your strategy without risking real capital.
- Start Small: When transitioning to live trading, begin with a small portion of your capital to manage risk.
- Journaling: Maintain a trading journal to record your trades, emotions, and the rationale behind your decisions.
- Continuous Learning: Stay updated on market trends, trading techniques, and new Renko chart developments.
- Review and Adapt: Regularly review and adapt your trading plan based on your experiences and market changes.
Remember, trading is a journey that requires continuous learning and adaptation. Success in trading with Renko charts comes from discipline, patience, and the ability to learn from both wins and losses. By following the steps outlined in this guide, you are well on your way to mastering your Renko strategy and achieving your trading goals. Happy trading!
